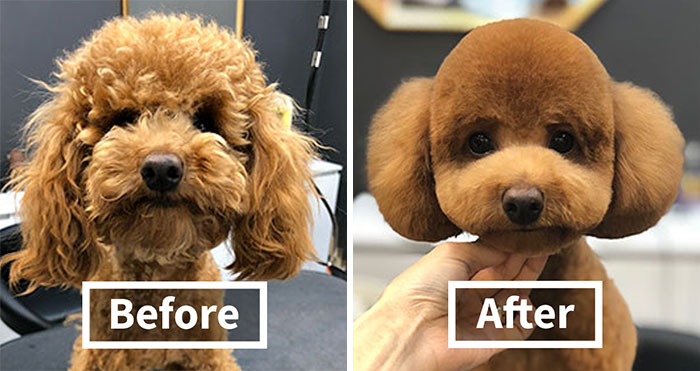
There are a number of different ways to create a round head style on your dog. The length will vary based on individual preference and length of body coat. It’s most important that the head be in balance with the body.
Here’s a short summary:
- For a fuller round head style, pull a medium or longer guard comb forward from the occiput toward the eyes.
- With shears, frame the eyes with a soft arch that is well blended.
- Bevel the muzzle.
- Continue to clip down the sides of the face just ahead of the ear canal.
- Blend all lines with thinning shears to soften the entire head piece.
The stop area should be trimmed very close, either with thinning shears or by clipping with a close blade, such as a #10 or a #15. This will clear the eyes of long fur and accentuate a nice, deep-set eye.
One style option is to take the same blade used to trim the body, and use it again for the top of the head and down the sides of the face. If a #4F, #5F, #7F or shorter guard was used on the body, follow the natural lay of the coat, working out from the center of the skull.
There will be an imaginary line just behind the eyes where you can feel the eye socket rims. The hair over the eyes in this area should be left to frame the eyes. This can be completed in the final trim by hand-scissoring.
Lift the ear out of the way and come down the sides of the face, in the jowl area, blending into the clipped neck. Remember to leave just enough hair at the back corners of the eyes to complete the framework for the eyes in the finished trim.
Another way to create a round head style is to use a medium to long guard comb. Due to the length of coat these combs leave, they are most effective when pulled forward from the occiput to the framed area of the eye.
The sides of the face are handled the same way as outlined above. With both head styles, the framed area over the eyes should be hand-scissored. Comb the hair forward over the eyes, making sure to get the hair in the stop area, too.
Scissor off the longer hair at a 45-degree angle, starting at the stop area to create a deep-set eye. A pair of curved shears in reverse can be helpful to create the framework around the eyes. The coat immediately over each eye is very close and bevels out as it gets farther away.
The beveled edge creates a ledge for the longer coat to sit on, keeps it out of the eyes and creates a soft expression. Double-check this line a number of times, as it is the most important part of the entire trim.
Soften the framed area with thinning shears once the correct line-is set. Double-check the line just behind the eyes where the clipper work feathers off. It should be smooth and even at the transition point.
Muzzle
With most round head styles, the muzzle area is trimmed by hand. There are multiple style options. The fur may be trimmed very short or left very long. The important thing is that the muzzle is evenly shaped and the edges are buffered into a soft, neat line.
Ears
There are many ear trims that work with this head style. Choose one that works and appeals to the owner—from shaved to very long or even tasseled. Shorter ear styles give the dog the look of a puppy. Longer ear styles could be rounded or blunt-cut to give a polished, soft look to the finished trim.
The line at the skull junction should be neat and tidy. With thinning shears, create a soft line over the top of the ears to gently define them. If the ear is clipped close, edge the ear leather with small detailing shears, keeping the tips of the shears towards the tips of the ears.
Trimming the ears to the length of the nose is a popular style for many pets. Trimming to the length of the nose not only balances well with the head, but also solves a sanitary issue with many dogs—ears dragging in the food or water dish.
The shorter ear style eliminates that problem. Longer ear styles also are popular. Just double-check that both ears are equal in length and the bottom edge is neat. Pull the ears forward and check behind and under the ears for long or missed hairs.
Tail
The tail, like the ears, has many style options. It may be left long and natural, trimmed to any length that suits the owner or tufted with a plume. The key is that it should be in balance with the overall dog.
Detail Finish
Check all over the dog for rough spots. Soften those areas with thinning shears. Normal trouble spots include the stop area by the eyes, around the ears, under the front legs, feet, flank and under the tail. Application of bows and mild cologne is optional.
Always discuss ear and tail options with the owner before trimming any substantial length from them. These are areas that most owners are very sensitive or passionate about. It’s always easier to take more coat off; it cannot be replaced once it has been trimmed.